Saturday, April 30, 2022

How to Create a YouTube Channel

 Creating a well-managed YouTube channel with consistent content can help businesses grow better, but doing it right is just as important. Here's how to do it step-by-step.

1. Sign in to your Google account.

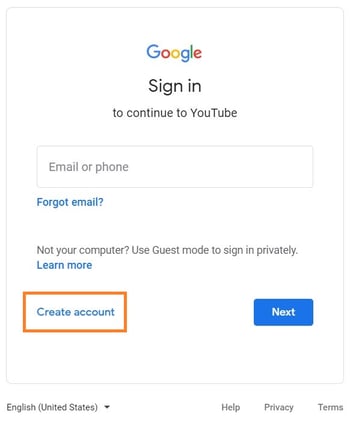
To watch, share, create, and comment on YouTube content, you'll need a Google account. Go to youtube.com and click "Sign In" in the upper right-hand corner. From there, you'll be taken to a Google sign-in page. 

  1. If you have a Google account, you'll be prompted to sign in. 
  2. If you have multiple Google accounts, be sure to select the one you want to be associated with the YouTube channel.
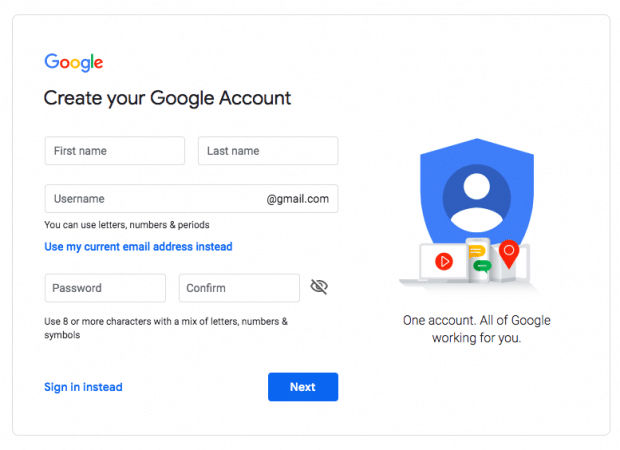
  3. If you do not have a Google account, click "Create Account" and follow the prompts to register for one.

youtube sign-in page with "create account" prompt

2. Create a new YouTube channel using your Google account.

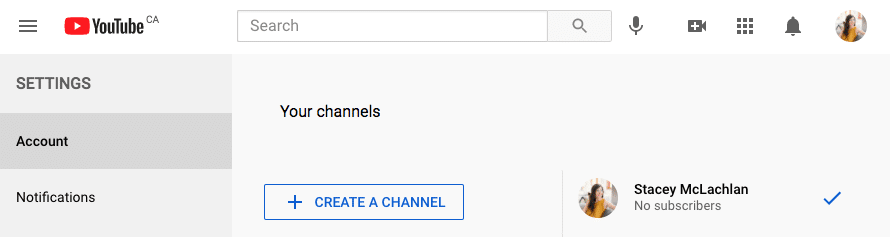
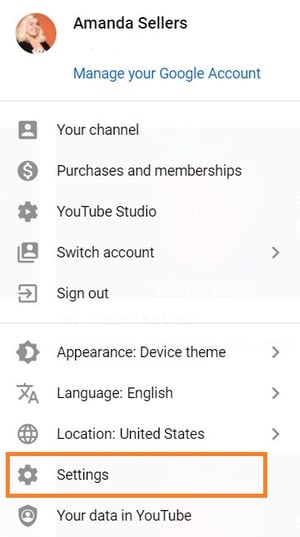
Once you're set up with and signed into your Google account, it's time to create a channel. Click your user icon in the upper right-hand corner. This represents both your Google account and you YouTube account (as YouTube is owned by Google). You'll see a drop-down menu, where you'll want to click "Settings."

youtube channel settings menu

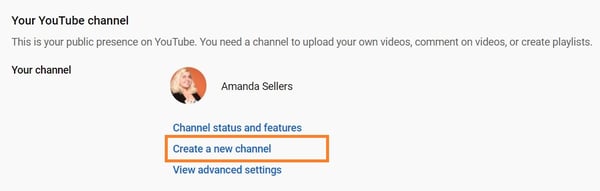
From there, you'll be taken to your account overview. Click "Create a new channel" under "Your channel."

youtube create new channel

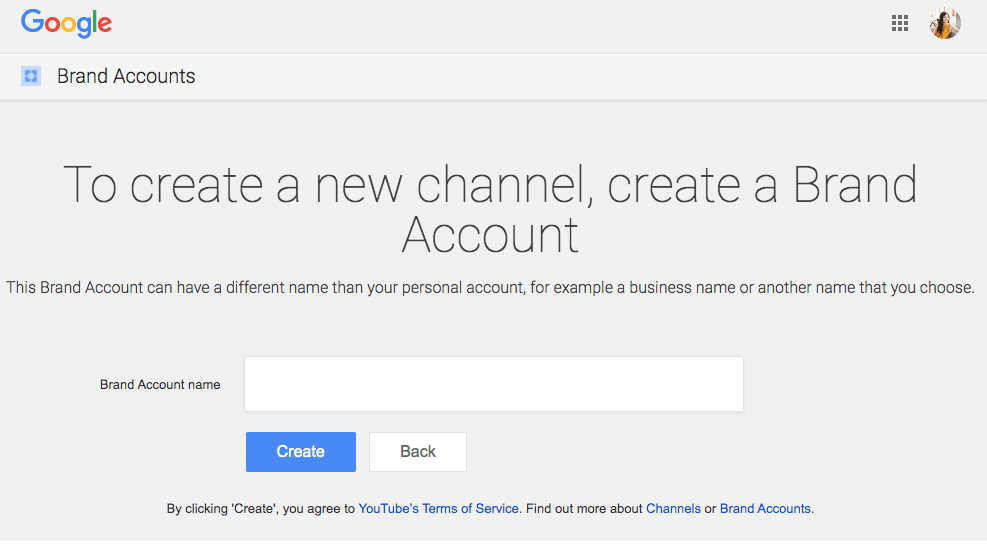
The first step is to create a Brand Account. It can be whatever name you want, and doesn't have to be the same name that you used to create your Google account -- but we do recommend that it reflects the brand the YouTube Channel will represent.

create a brand account in youtube

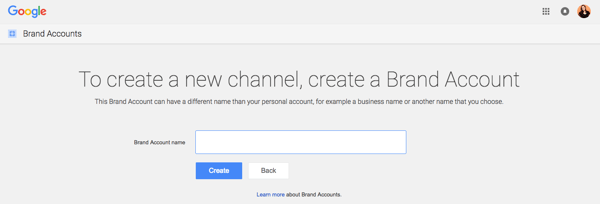
After you enter the Brand Account name, you might be asked to verify the account via text message or voice call. If that happens, enter the code you receive from the option you choose.

Once you've verified your Brand Account, you'll be taken to the dashboard for your channel. Now, it's time to start customizing it.

3. Navigate to the Customize Channel page.

We'll start with the fundamental details about your channel. From your channel dashboard, click "Customize channel."

youtube customize channel

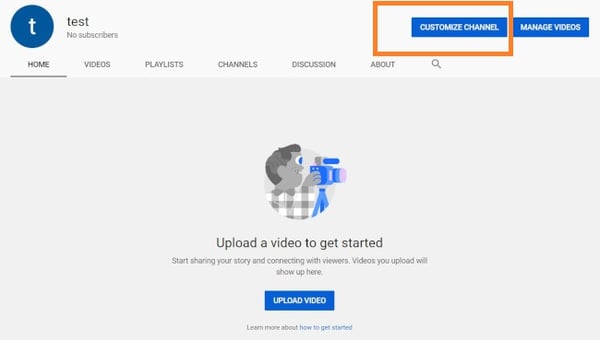
From there, you'll be taken to the channel customization page.

You'll notice three tabs: "Layout," "Branding," and "Basic info." These three tabs will help you optimize your channel for viewers.

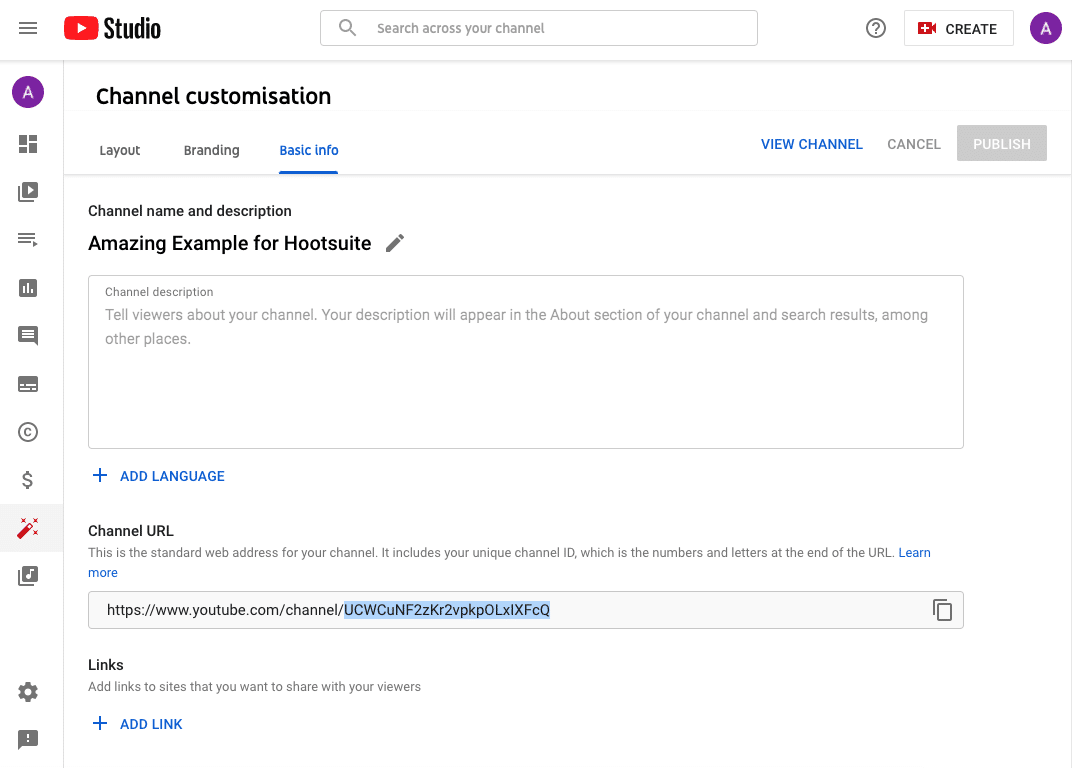
4. Add Basic Info to your channel for discoverability.

Start by clicking "Basic info."

youtube channel customization basic info

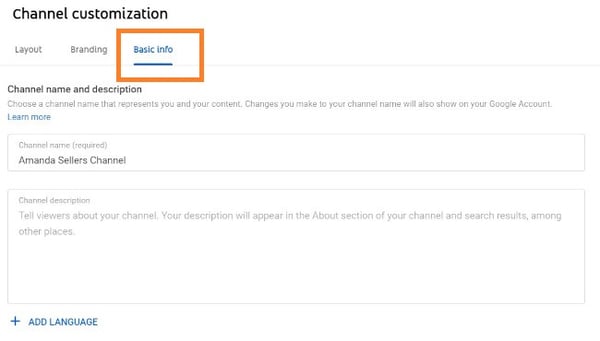
Here's where you'll enter some basic information about your channel, like the language your videos are in, as well as a description that helps people discover your channel when they enter search terms that describe what videos they're looking for. These keywords can include what your channel is about, the problems it helps solve, the people and products featured, your industry, and more.

You'll also be able to add links to sites you want to share with your viewers. These links will be displayed over your banner image (more on this later) like so:

youtube featured links

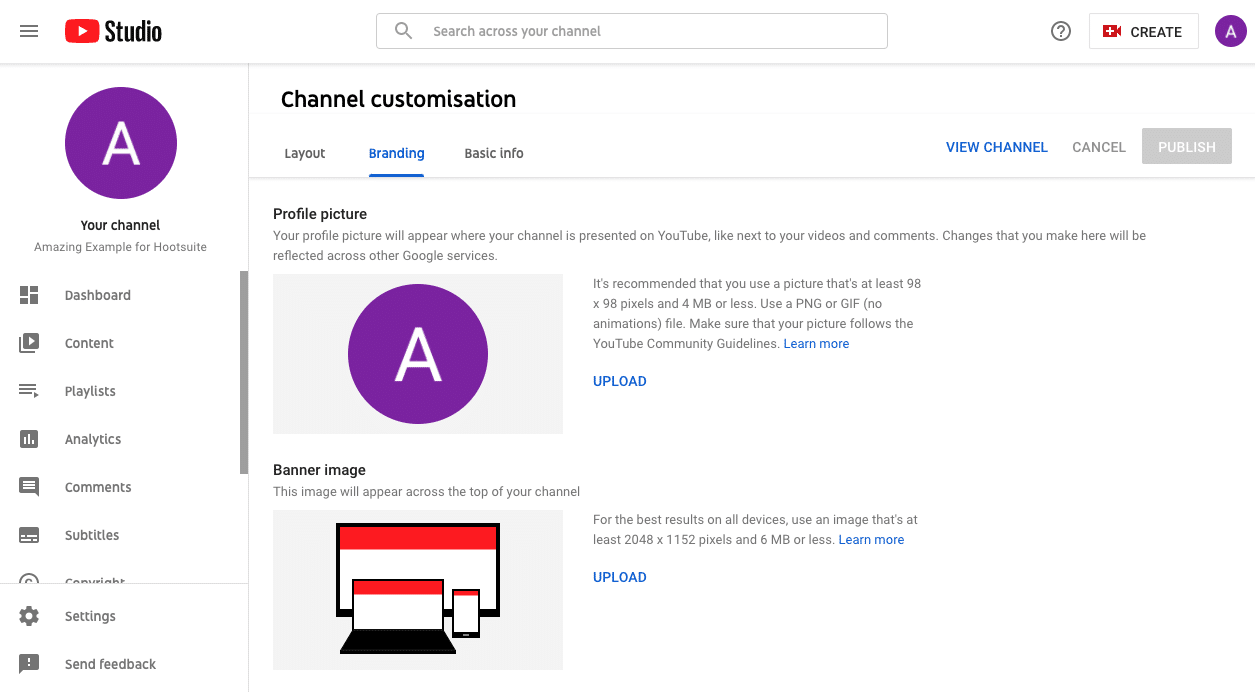
5. Upload branding elements to your channel.

In addition to the descriptive details that you've added, there's another element of customization for a new YouTube channel: The visuals.

youtube channel customization branding

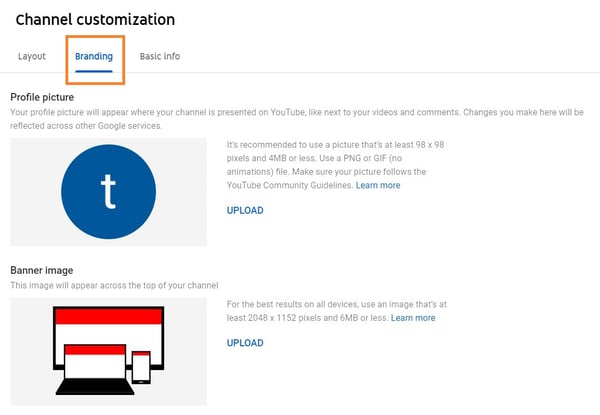
Under the "Branding" tab, you'll be able to add your:

Profile Picture

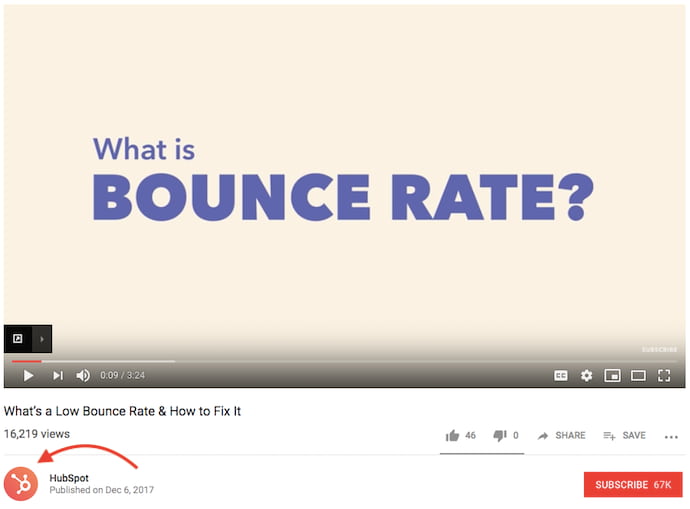
Among this channel art is your profile photo -- this is how YouTube users will identify the creator of a video when browsing video content. You'll see this image appear beneath YouTube videos on the play page, as shown below. YouTube recommends using a picture with dimensions of at least 98 x 98 pixels.

youtube profile photo

Banner Image

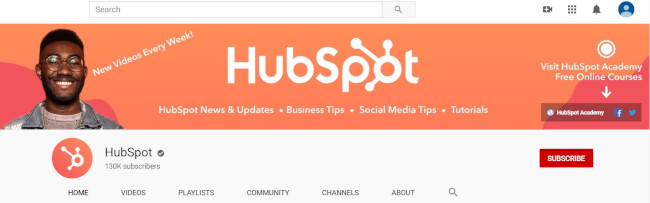
The banner image is a large banner displayed at the top of your channel page, and it's a big opportunity to convey your brand to your viewers. YouTube recommends using an image that's at least 2048 x 1152 px.

youtube banner image

Video Watermark

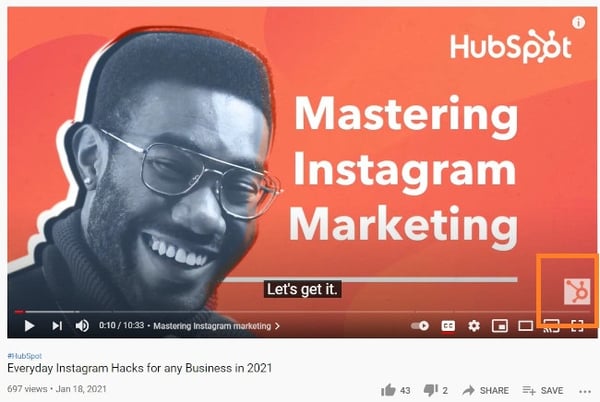
The video watermark is displayed at the bottom right of every video you post (see below). You'll want to choose a logo that best represents you sized at 150 x 150 px.

youtube video watermark

6. Customize your more advanced layout options.

Click the "Layout" tab.

youtube channel customization layout
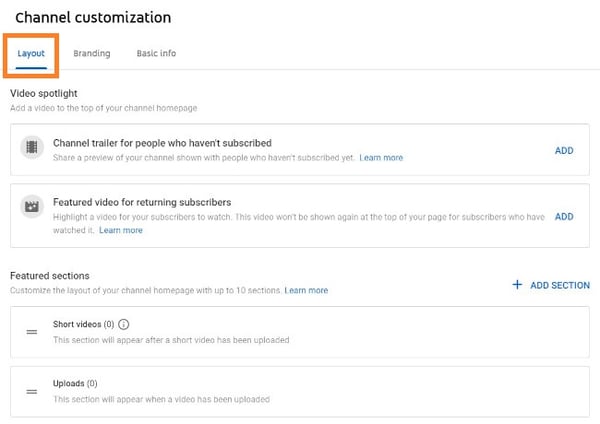
From here, you'll be able to specify certain details about how you want your content presented on your channel's page. You'll have the option to designate a video spotlight and organize your channel page with featured sections.

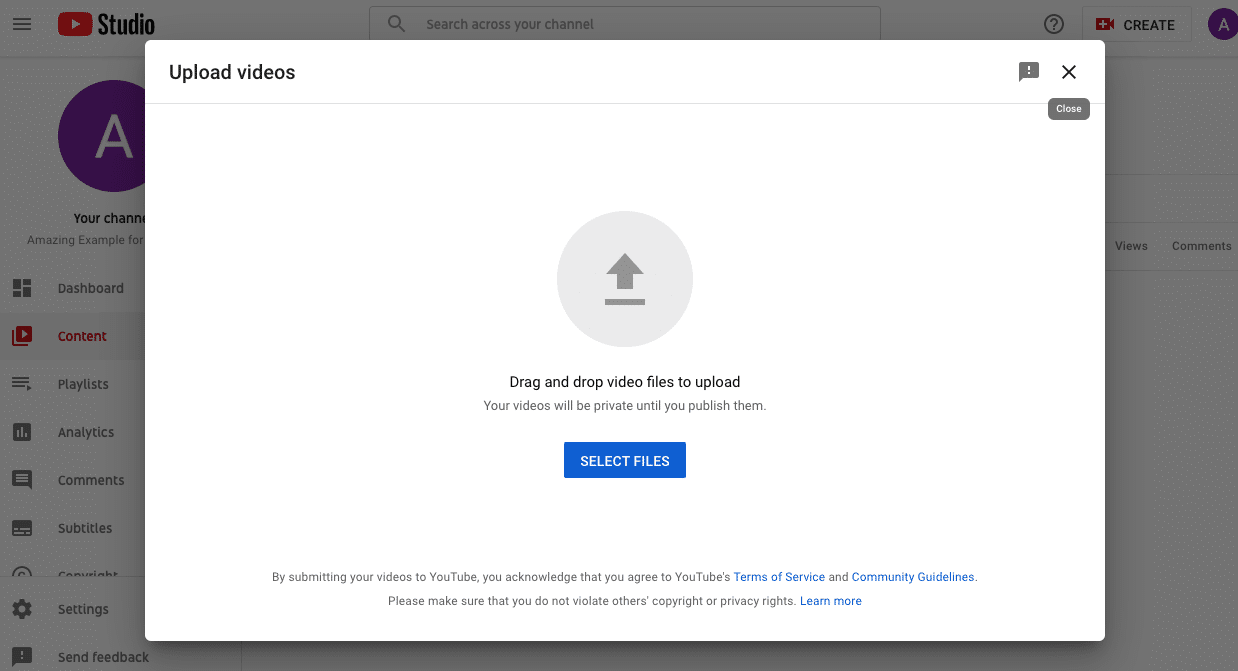
7. Add videos and optimize them for search.

To upload your first video to YouTube, click the "Create" button in the top-right corner and follow the prompts.

youtube upload videos by clicking "Create" button

Optimizing your channel for discoverability is just the beginning. Once you start adding videos, you'll want to optimize them for search, which in turn helps users discover your video.

But this goes beyond giving your videos accurate, clear, and concise titles -- though that is important. Below, we describe some of the most important things to optimize on YouTube. (For a fully comprehensive post on YouTube SEO, visit this post.)

Title

When we search for videos, one of the first things that our eyes are drawn to is the title. That's often what determines whether or not the viewer will click to watch your video, so the title should not only be compelling but also clear and concise.

Description

This should be limited to 1,000 characters -- and remember that your viewer came here to watch a video, not to read a lot of text. Plus, YouTube only displays the first two or three lines of text, which comes to about 100 characters, so front-load the description with the most important information.

Tags

Using tags doesn’t just let viewers know what your video is about -- they inform YouTube, too, which uses tags "to understand the content and context of your video," according to Backlinko. That way, YouTube can associate your video with similar videos, which can broaden your content's reach. But approach with caution -- just as with your title, don't use misleading tags because they might get you more views -- in fact, Google might penalize you for that.

Category

Choosing a category is another way to group your video with similar content on YouTube -- but that might not be as simple as it sounds. YouTube's Creator Academy suggests that marketers "think about what is working well for each category" you're considering by answering questions like:

  • Who are the top creators within the category? What are they known for, and what do they do well?
  • Are there any patterns between the audiences of similar channels within a given category?
  • Do the videos within a similar category have share qualities like production value, length, or format?

That's it -- you've officially not only created a YouTube channel but now also know how to optimize its content for discoverability. For more information on how to best leverage YouTube for marketing, check our entire collection of resources.

How to create a new YouTube channel in 5 simple steps


How to create a new YouTube channel in 5 simple steps

Making a successful YouTube channel starts with making YouTube channel. Here’s how to build your account.

Step 1: Create a Google account

If you use Gmail, Google Maps, or Google Play, you probably already have a Google account… so skip ahead to the next step.

If you’re starting from scratch, head here to sign up for a new Google account.

create Google account page

The name and email address won’t be publicly linked to your brand, so don’t worry about keeping those on-message. This is just your key to get in the YouTube door.

Step 2: Create a YouTube account

With your Google account, you’re automatically set up with a personal YouTube account. But to use YouTube for your business, you’ll want to set up a Brand Account.

Just go to your YouTube account page, click Create a Channel, and then enter a name for your Brand Account. You’re in!

When you create a YouTube Brand Account, you can give multiple people admin access and customize the name and appearance to match your brand.

Another cool thing about Brand Accounts: they allow you to access YouTube Analytics, which offers super helpful insight about who’s watching your videos and what content is popular. (Learn more in our post on how to use YouTube for marketing.)

YouTube account page create a channel

create a Brand Account

Step 3: Customize your YouTube channel

Time to make this sweet new social media profile your own.

In your channel dashboard, click Customize channel. Go through the three tabs — LayoutBranding and Basic Info — to enter information that will help optimize your channel for audience discovery.

channel customization layout branding and basic info

When filling out this information, use descriptive keywords that will help your account appear in searches.

Keywords can include your channel’s topics, your industry, questions your content can answer or products featured.

Under Branding, you’ll have the opportunity to upload your channel art and icons to give your channel a unique look. One that, ideally, aligns with your overall brand and visually connects this YouTube account with your other social media platforms and web presence.

branding profile picture and banner image

We’ve got some templates for YouTube channel art right here to get you started.

Step 4: Upload your first YouTube video

Well, this is exciting. You’re on the cusp of becoming a YouTube content creator! I’m not crying, you’re crying.

To put your first video out into the world, hit the Create button in the top-right corner and follow the instructions.

upload YouTube video

Step 5: Make your YouTube channel discoverable

Like the old saying goes: If you have amazing content on YouTube but nobody sees it… what’s the point?

To get views and subscribers, you’ll want to optimize your channel and videos for discovery. We’ve got a complete guide to promoting your YouTube channel if you want to dive in deep. In the meantime, here’s the 30-second rundown:

Optimize video titles

Use concise, descriptive titles that include Google-friendly keywords. Titles are the first thing users see, but they also help the search engine understand what your videos are about. So make sure all your titles are punchy and intriguing, but also clear and include keywords.

Optimize your YouTube description

It’s important to be clear, concise and descriptive here, too. Make sure to front-load your keywords and add links to other playlists.

Another good trick to use in video descriptions? Create a “table of contents” with timestamps to help viewers find what they’re looking for.

For more specific tips, check out our complete guide to writing a winning YouTube description.

Add tags (in moderation)

While it can be tempting to load up this section with clickbaity tags, make sure to only include tags that are relevant to your content. Be honest, and choose quality over quantity. The goal is to reach viewers who are actually interested in content like yours.

Tags also help YouTube’s algorithm understand what your content is about. Make sure to add a category or two to help the search engine put your videos in front of the right audience.

Cross-promote

Add a link to your YouTube channel on your other social profiles, website and email signature to let your existing fans know you’re starting a video empire.

Understand the algorithm

If you haven’t already, now is the time to familiarize yourself with the YouTube algorithm. This AI determines not just search results, but recommendations for the all-important “what’s up next” sidebar, too.

Wednesday, April 20, 2022

How to Build an Email List from your Gmail Account

 Building a mailing list in Gmail is helpful when you’re sending bulk emails. As you’re simply adding a contact list to your emails, you won’t have to type out each email address manually.

In this step-by-step guide, I’ll walk you through how to build an email list in Gmail.

However, the Gmail method has some serious drawbacks.

That’s why I‘ll also show you how to use a free mail merge tool to create massive email lists.

Further Reading

  • Want to become a Gmail pro? Check out my article on the 16 best Gmail tips and tricks you should know.
  • Also, learn how to check your spam folder in Gmail and Outlook.

This Article Contains:

(Click on the links to jump to a specific section.)

  • How To Create An Email List In Gmail Using Labels
    • 3 Major Drawbacks of The Label Method in Gmail
  • How To Create An Email List In Gmail With A Mail Merge App  
    • Build A Mailing List Using Gmail Labels
    • Build A Mailing List Using Gmail Search
    • Build A Mailing List Using Transactional Emails Notification
    • Benefits of The GMass Method

Let’s dive in.

How To Create An Email List In Gmail Using Labels

Whether you want to send bulk emails to your blog subscribers or send mass emails to your colleagues, creating a distribution list in Gmail or Google Workspace (formerly G-Suite) can be helpful.

But how do you do that?
Simple!

Just use the Gmail labels feature.

Here’s a step-by-step guide on how to create a Gmail mailing list using labels:

Step 1
Log in to the Gmail app and click Google Contacts from the Google Apps drop-down menu.

Contacts

Alternatively, you can visit the Google Contacts page (also known as the Gmail Contacts app) to add a new contact, edit contact details, or create labels for your contacts list.

Step 2
To create contact lists, go through the list of contacts displayed and select the ones you want to include in the new label. Click the checkbox next to the contact to select.

Contacts list

Step 3
Click on the label icon to create a label with your new group of selected contacts.

Manage labels

Step 4
Once you click the label icon, a new window will appear.

Choose “Create Label” and enter a Google contact group name. Then, click “Save” to create your new label for the selected group of people within the Gmail Contacts app.

Create label

Note: The created Gmail group label (mailing list) will be displayed under “Labels” in the Preview pane.

Step 5
To send an email message to the Google contact group, click on the Compose button from your Gmail inbox and type the label name in the To address field.

Once you enter the name of the group, you’ll be able to see the email ids of all the Gmail group members.

Sample draft

Step 6
Now type in your email message and hit “Send.”

If you’re not a Gmail user and want to create group email lists in Microsoft Outlook instead, read my step-by-step guide on how to build group contact lists in Outlook. 


Although creating a Gmail mailing list using the label option is straightforward, it has some serious limitations.

3 Major Drawbacks of Gmail’s Label Method

Here are three disadvantages of the Gmail “create label” method:

1. Impractical For Large Contact Lists

While Gmail’s labels feature lets you easily send mass emails, adding multiple contacts to your email distribution list is still a tough process.

Why?
It’s time-consuming and error-prone to manage labels in Gmail as you’ll have to manually go through your contacts to identify and add contact addresses. When adding a new contact or adding multiple contacts, you could accidentally add the wrong person or overlook a contact.

2. No Analytics

Gmail doesn’t give you any stats or analytics over your emails.

While this might not be an issue for casual Gmail users, it’s a significant problem for email marketers and salespeople sending multiple emails in bulk daily.

Why?
Without accurate data, such as when the recipient opened the email or what links they clicked, you won’t know if your email marketing campaigns are working or not.

3. No Automatic Follow-ups

Using Gmail’s labels for marketing follow-up emails is virtually impossible.

Here’s why:
If your mailing list includes 100 people, of which 50 didn’t respond, you’ll have to manually add contact addresses to your follow-up emails  — you can’t add multiple recipients at once. This is going to waste tons of time, something that most email marketers can’t afford.


Clearly, creating email lists in the Gmail app isn’t really the best way to send mass emails.

Don’t worry. I’ll cover three simple methods for creating Gmail email lists using a powerful email outreach tool — GMass.

Creating an Email List in Gmail with GMass

Gmass

GMass is a powerful email outreach tool that allows users to run email campaigns from their Gmail inbox.

Its mass emailing features have made it a popular Chrome extension for employees from startups and giants like Google, LinkedIn, Facebook, and Twitter.

Individuals, schools, clubs, or Gmail users who want to send emails from their Google account to their subscribers or target audience can also use GMass.

The best part?
GMass is super easy to use, and anyone can get started in no time!

Now, I’ll cover the various ways you can create an email list in Gmail using GMass.

How To Create A Mailing List In Gmail with GMass

GMass gives you three simple ways to quickly build a mailing list in Gmail:

  • Build A Mailing List Using Gmail Search
  • Build A Mailing List Using Gmail Label
  • Build A Mailing List Using Transactional Emails Notification

Here’s a step-by-step guide on how to create an email list in Gmail using GMass’s professional email method.

A. How To Build A Mailing List Using Gmail Search

Let’s imagine you are the owner of the new business, Ted’s Tadpole Tanks.

You have a personal Gmail account you’d like to use to send all those who have corresponded with you in any way about tadpole tanks to alert them of your grand opening.

We’ll use this example and provide a step-by-step guide to sending out this campaign.

Step 1
Log in to your Gmail inbox. Then, enter a search term in the search bar and click on Gmail’s search button (magnifying glass).

Search option

Now, Gmail displays all emails which include the word “tadpole,” our search term. These are people connected to the term “tadpole” in our emails and those we want to reach out to.

Tadpole word

Step 2
Now, click the “Build Email List” button (red magnifying glass).

Build email list button

GMass will start building an email list using the ids found in your search result (indicated by a black pop-up).

Gmass notification

Note: GMass’ “Build Email List” (red magnifying glass) button is only shown after you have either performed a Gmail search or clicked on labels. Either action will result in a specified subset of your Gmail emails being displayed. 

At other times, when it is not currently applicable, the button is not displayed.

Step 3
When GMass has completed building the email list, a Gmail “Compose” window will be displayed.

In the “To” field, an alias address will be displayed that represents the recipients in your list.
The Gmail send button will also be hidden (find out why).

Hidden search

You can choose to display the send button and the recipients’ addresses in your email list.

New message tab

Note: You can click the GMass icon next to the CC and BCC buttons to connect to an email list in a Google Sheet or past campaign. 

Step 4
Compose your subject and email message and click the “GMass” button to send the mail.

Compose email

You can click the “Sent Mail” folder to see individual emails sent to each recipient, as shown below.

See individual emails

Note: GMass will search for a maximum of 5,000 messages for email addresses. If you enter a search term(s) that results in more than 5,000 matching messages, only the most recent 5,000 messages will be used to find email addresses.


B. How To Build A Mailing List Using Gmail Labels

GMass allows you to build a mailing list from a label in Gmail.

Unlike creating a mailing list using Gmail search, using the label option limits the mailing list to only those you’ve specifically tagged before. Labels provide an extra level of specificity to make your email campaigns more precise.

Step 1
Log in to your Gmail account and click a label of your choice from the left-hand side menu. Gmail will then display all emails under that label.

All emails

Step 2
Click the “Build Email List” button to generate a contacts list.

Build email list 2

Step 3
GMass will generate a mailing list of all email addresses taken from emails under that label. Then, a Gmail “Compose” window containing your recipients in the “To” address box will be displayed.

New message tab

Step 4
Compose your email message. Hit the “GMass” button to send the email.


C. How To Build A Mailing List Using Any Transactional Emails Notification

A transactional email is an email that’s triggered by a user action (account creation, feedback/comments, purchase receipts, etc.) on your website.

Usually, these emails contain user ids in their subject line.

Mailing list

You can use GMass’s Build Email List feature for quickly creating a mailing list from these email notifications.

Step 1
Log in to your Gmail inbox and enter a search term that pulls a set of transactional email notifications. Click the “Build Email List” button.

Build email list 3

Step 2
GMass will start building an email list using the ids found in your search result (indicated by a black pop-up).

Gmass notification

Step 3
When GMass has built the email list, a Gmail “Compose” window containing an alias email ID representing your recipients is displayed in the “To” address field.

Hidden search 2

You can click on “Expand address” to display your recipients’ email IDs in the “To” address field instead.

New message tab 3

Step 4
After composing your email, click the “GMass” button to send it.

That’s it! Now you can easily build and manage email lists from your Gmail account!

Note: The GMass method only works on the desktop and Gmail mobile app for Android


Benefits of The GMass Method

Here’s why the GMass approach is better than Gmail’s labels method:

  • Time-saving: GMass can easily search and find email addresses deep inside your Gmail account in seconds and speed up your list building process. You can even upload email lists stored in a Google SheetExcel, or CSV file quickly.
  • Automatic personalizationAutomatically personalize various aspects of group emails on a recipient-by-recipient basis, including paragraphsimageslinks, and attachments.
  • Automatic Follow-ups: Send automatic email follow-ups for your email campaigns. This way, you don’t have to manually follow-up on every email.
  • Customize Follow-ups: Customize everything about follow-ups — such as the number of follow-ups, time gaps between follow-up emails, and the follow-up email message.
  •  Detailed Stats And Analytics: GMass provides detailed stats and analytics of email recipients’ behavioral data. You can use this data to determine if your email campaigns are working or not and to help boost your client engagement.
  • Easily Run Email Campaigns: Create and manage email campaigns for multiple recipients from your Gmail inbox.
  • Use the GMass add-on to manage your campaigns from the Gmail mobile app.

With GMass, you’ll have everything you need to run successful email campaigns and make the most of your email marketing efforts!

How to Use the Instagram Collab Feature for Posts and Reels

  Want to partner with other brands or influencers to co-create Instagram content? Wondering how to use the Instagram Collab feature for Ree...